
DIY: Make your Brazilian bracelets
Simple or original, we show you how to easily make Brazilian bracelets with our tutorial!
Material:
Steps :
Simple bracelet:
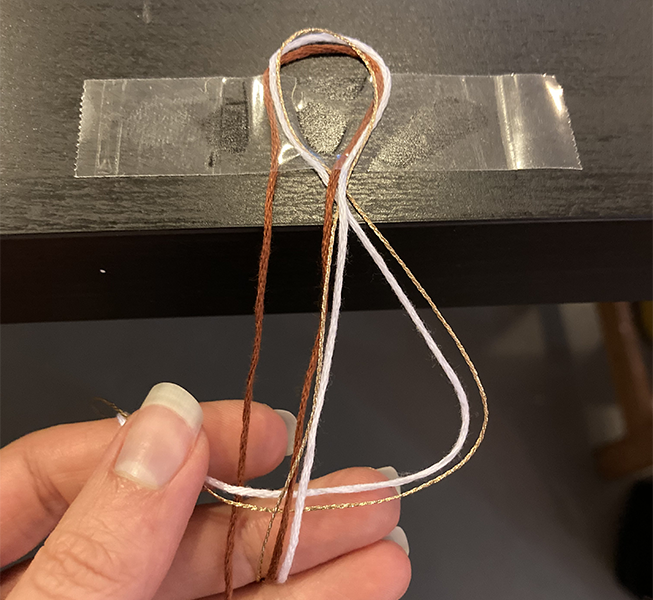
1. Take 3 strands and fold them in half.
2. Hold the bracelet with tape.
3. Put in the middle a white, gold and red wire which will remain static, on the left a red wire and on the right a white and gold wire.
4. Pass the white and gold wires under the 3 static wires and over the red wire.
5. Pass the red wire under the white and gold wires and over the 3 static wires.

6. Tighten.
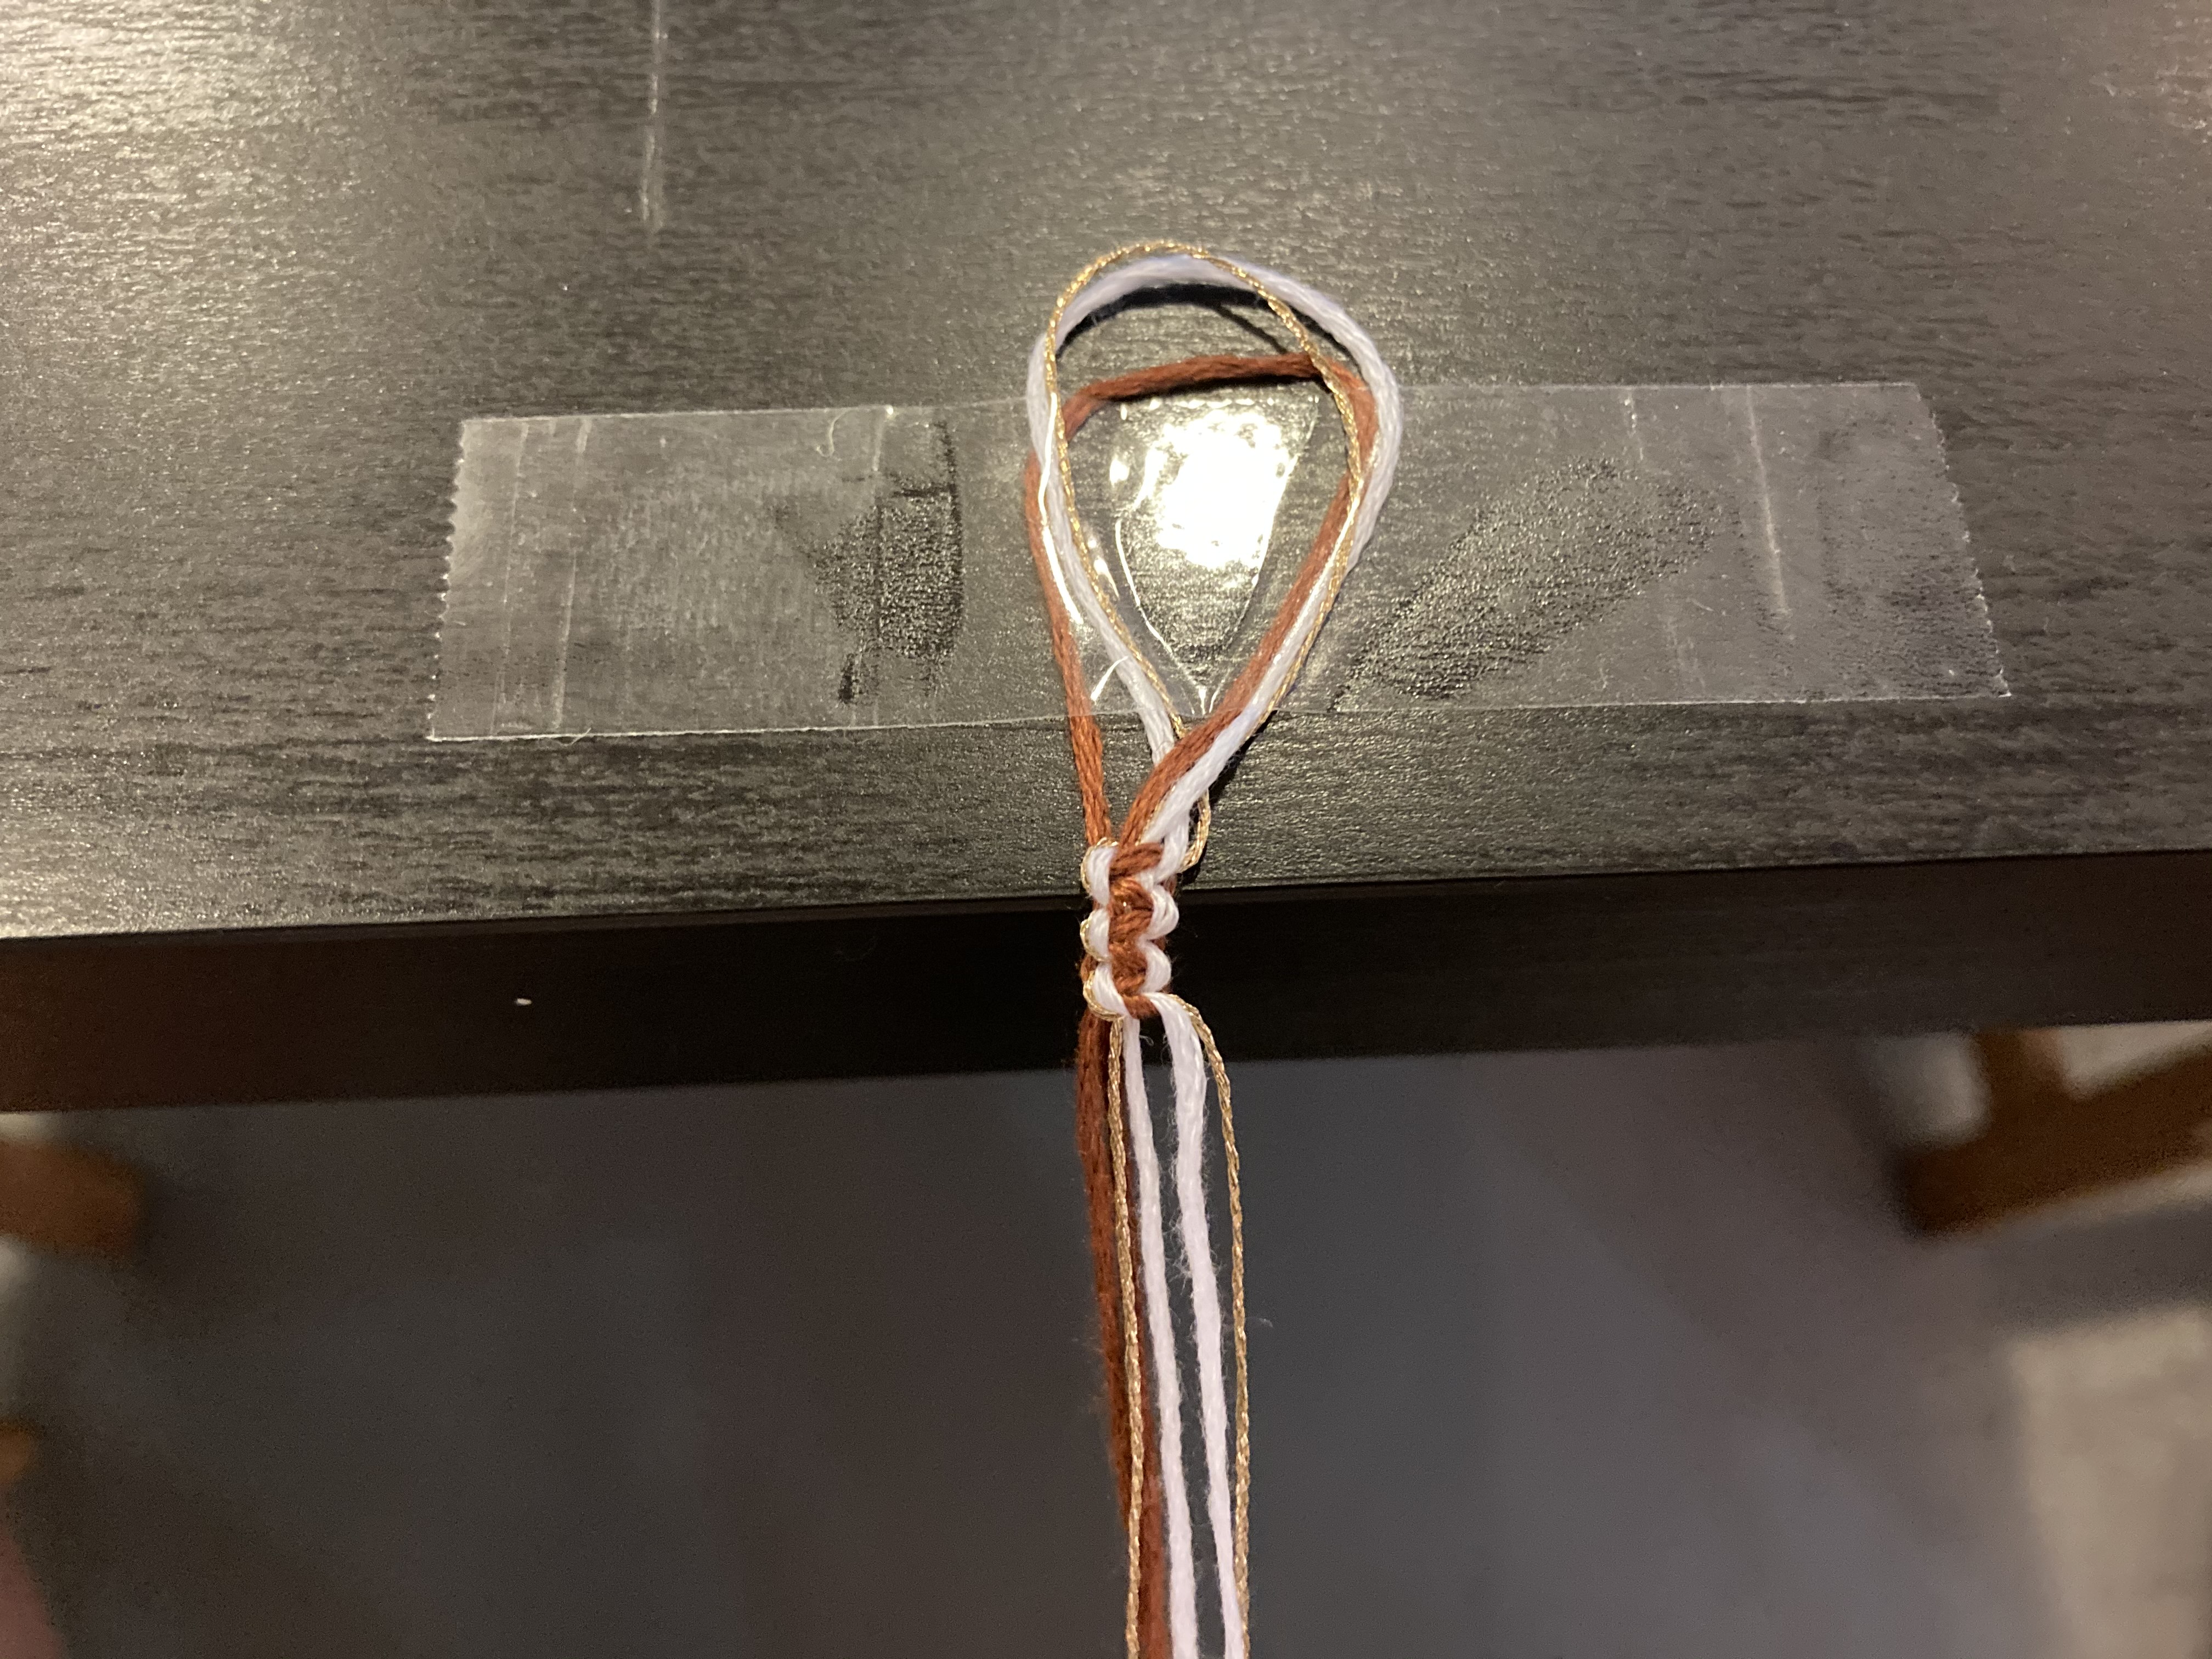
7. Repeat the memo-technical operation:
- White gold: below then above
- Red: above then below
8. When the bracelet is long enough, cut the ends, leaving a few inches of thread.
9. To tie your bracelet, you can tie a knot at each end, wrap a thread around both ends and tie a knot.
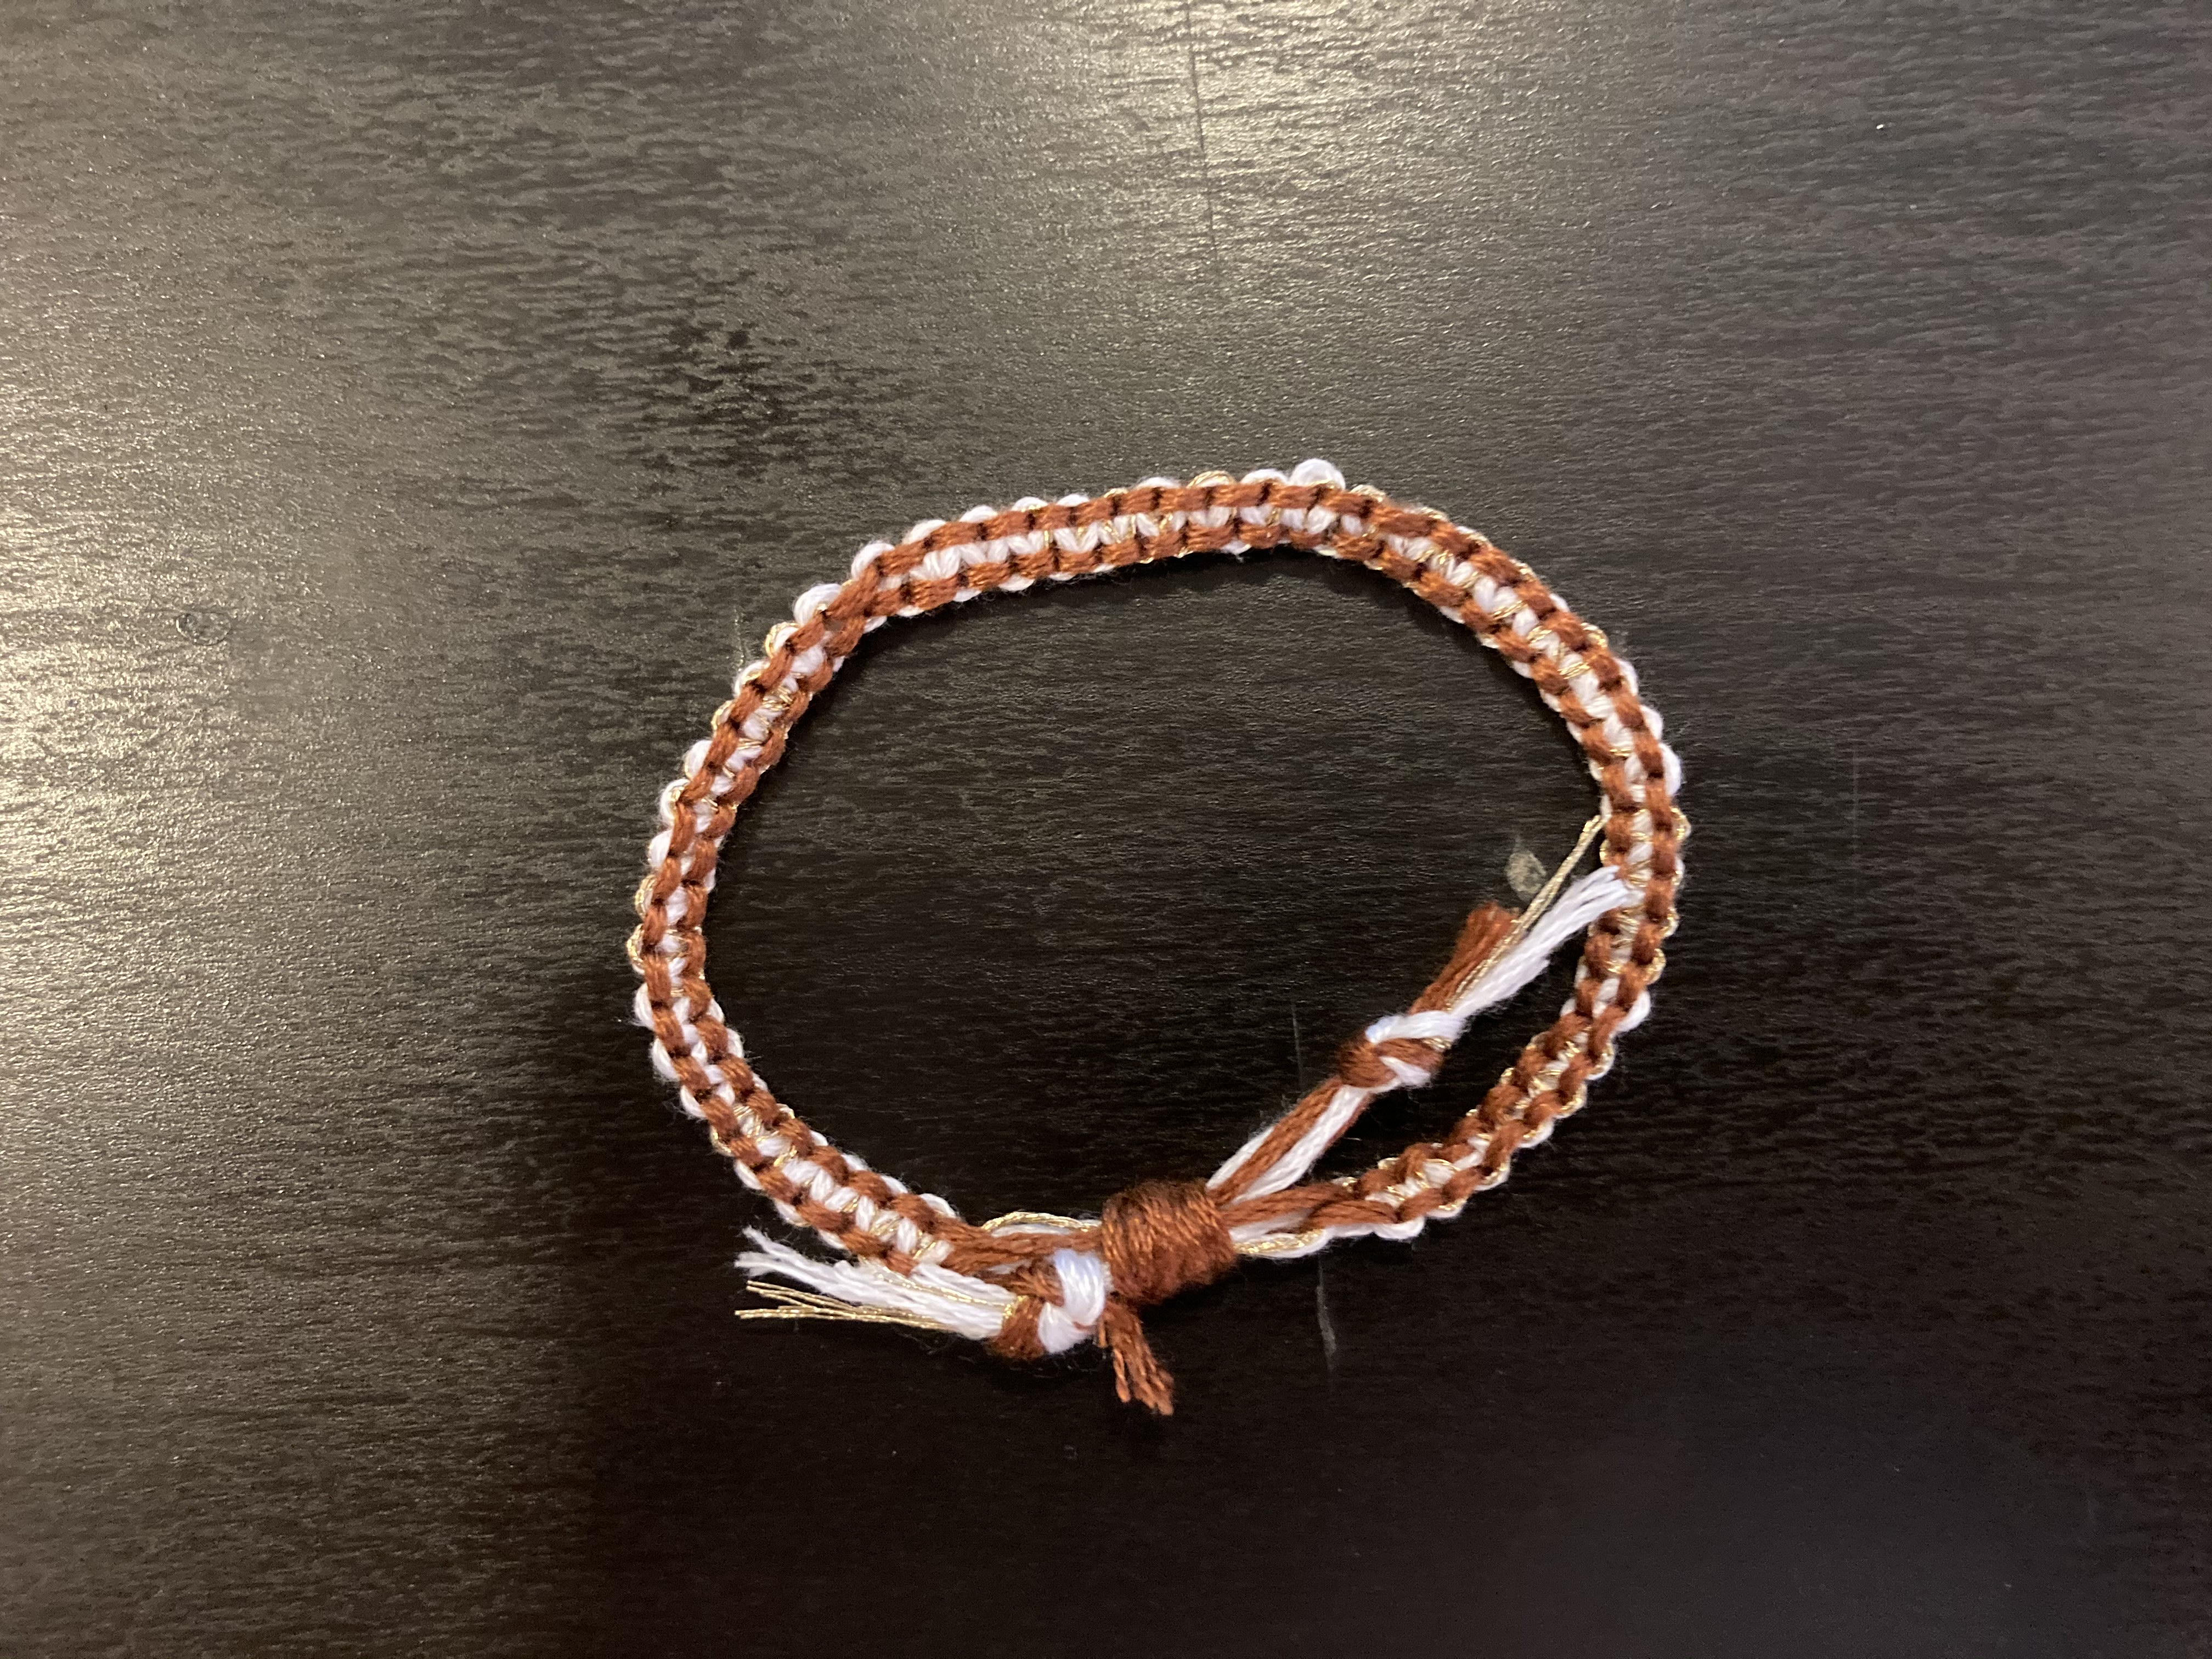
10. Your bracelet will be able to slide in this way in order to put it on and take it off your wrist!

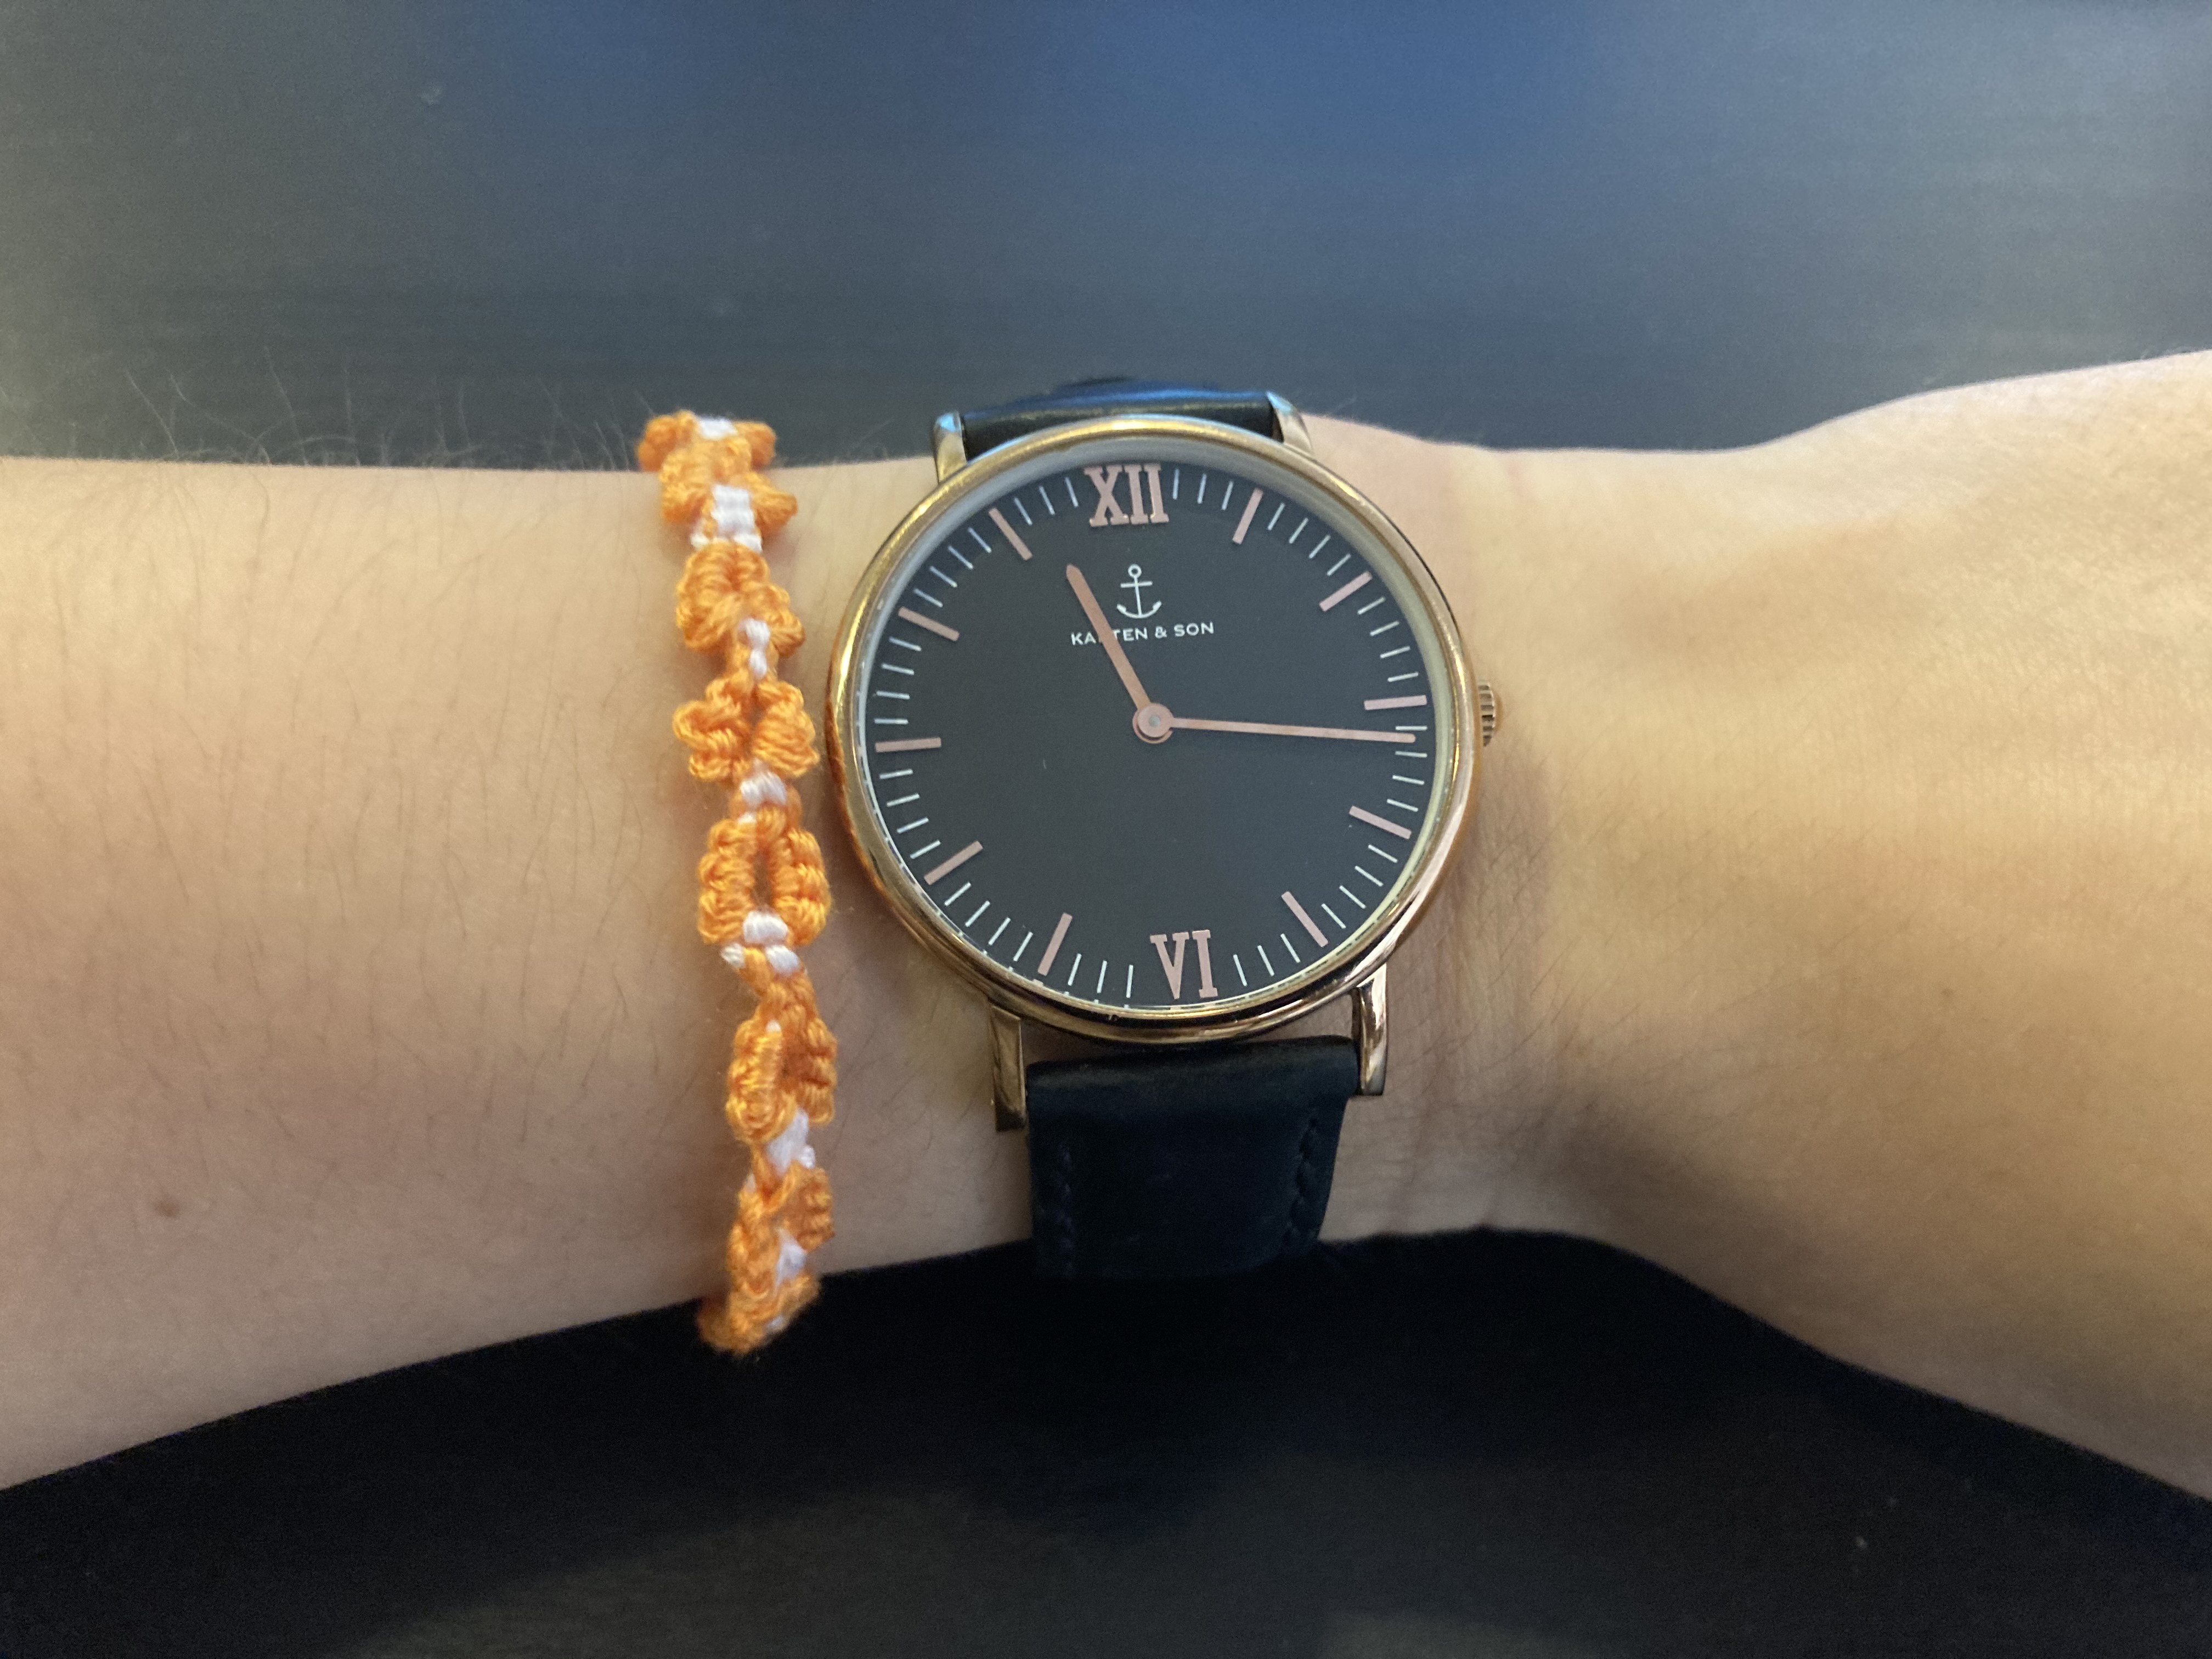
Original bracelet:
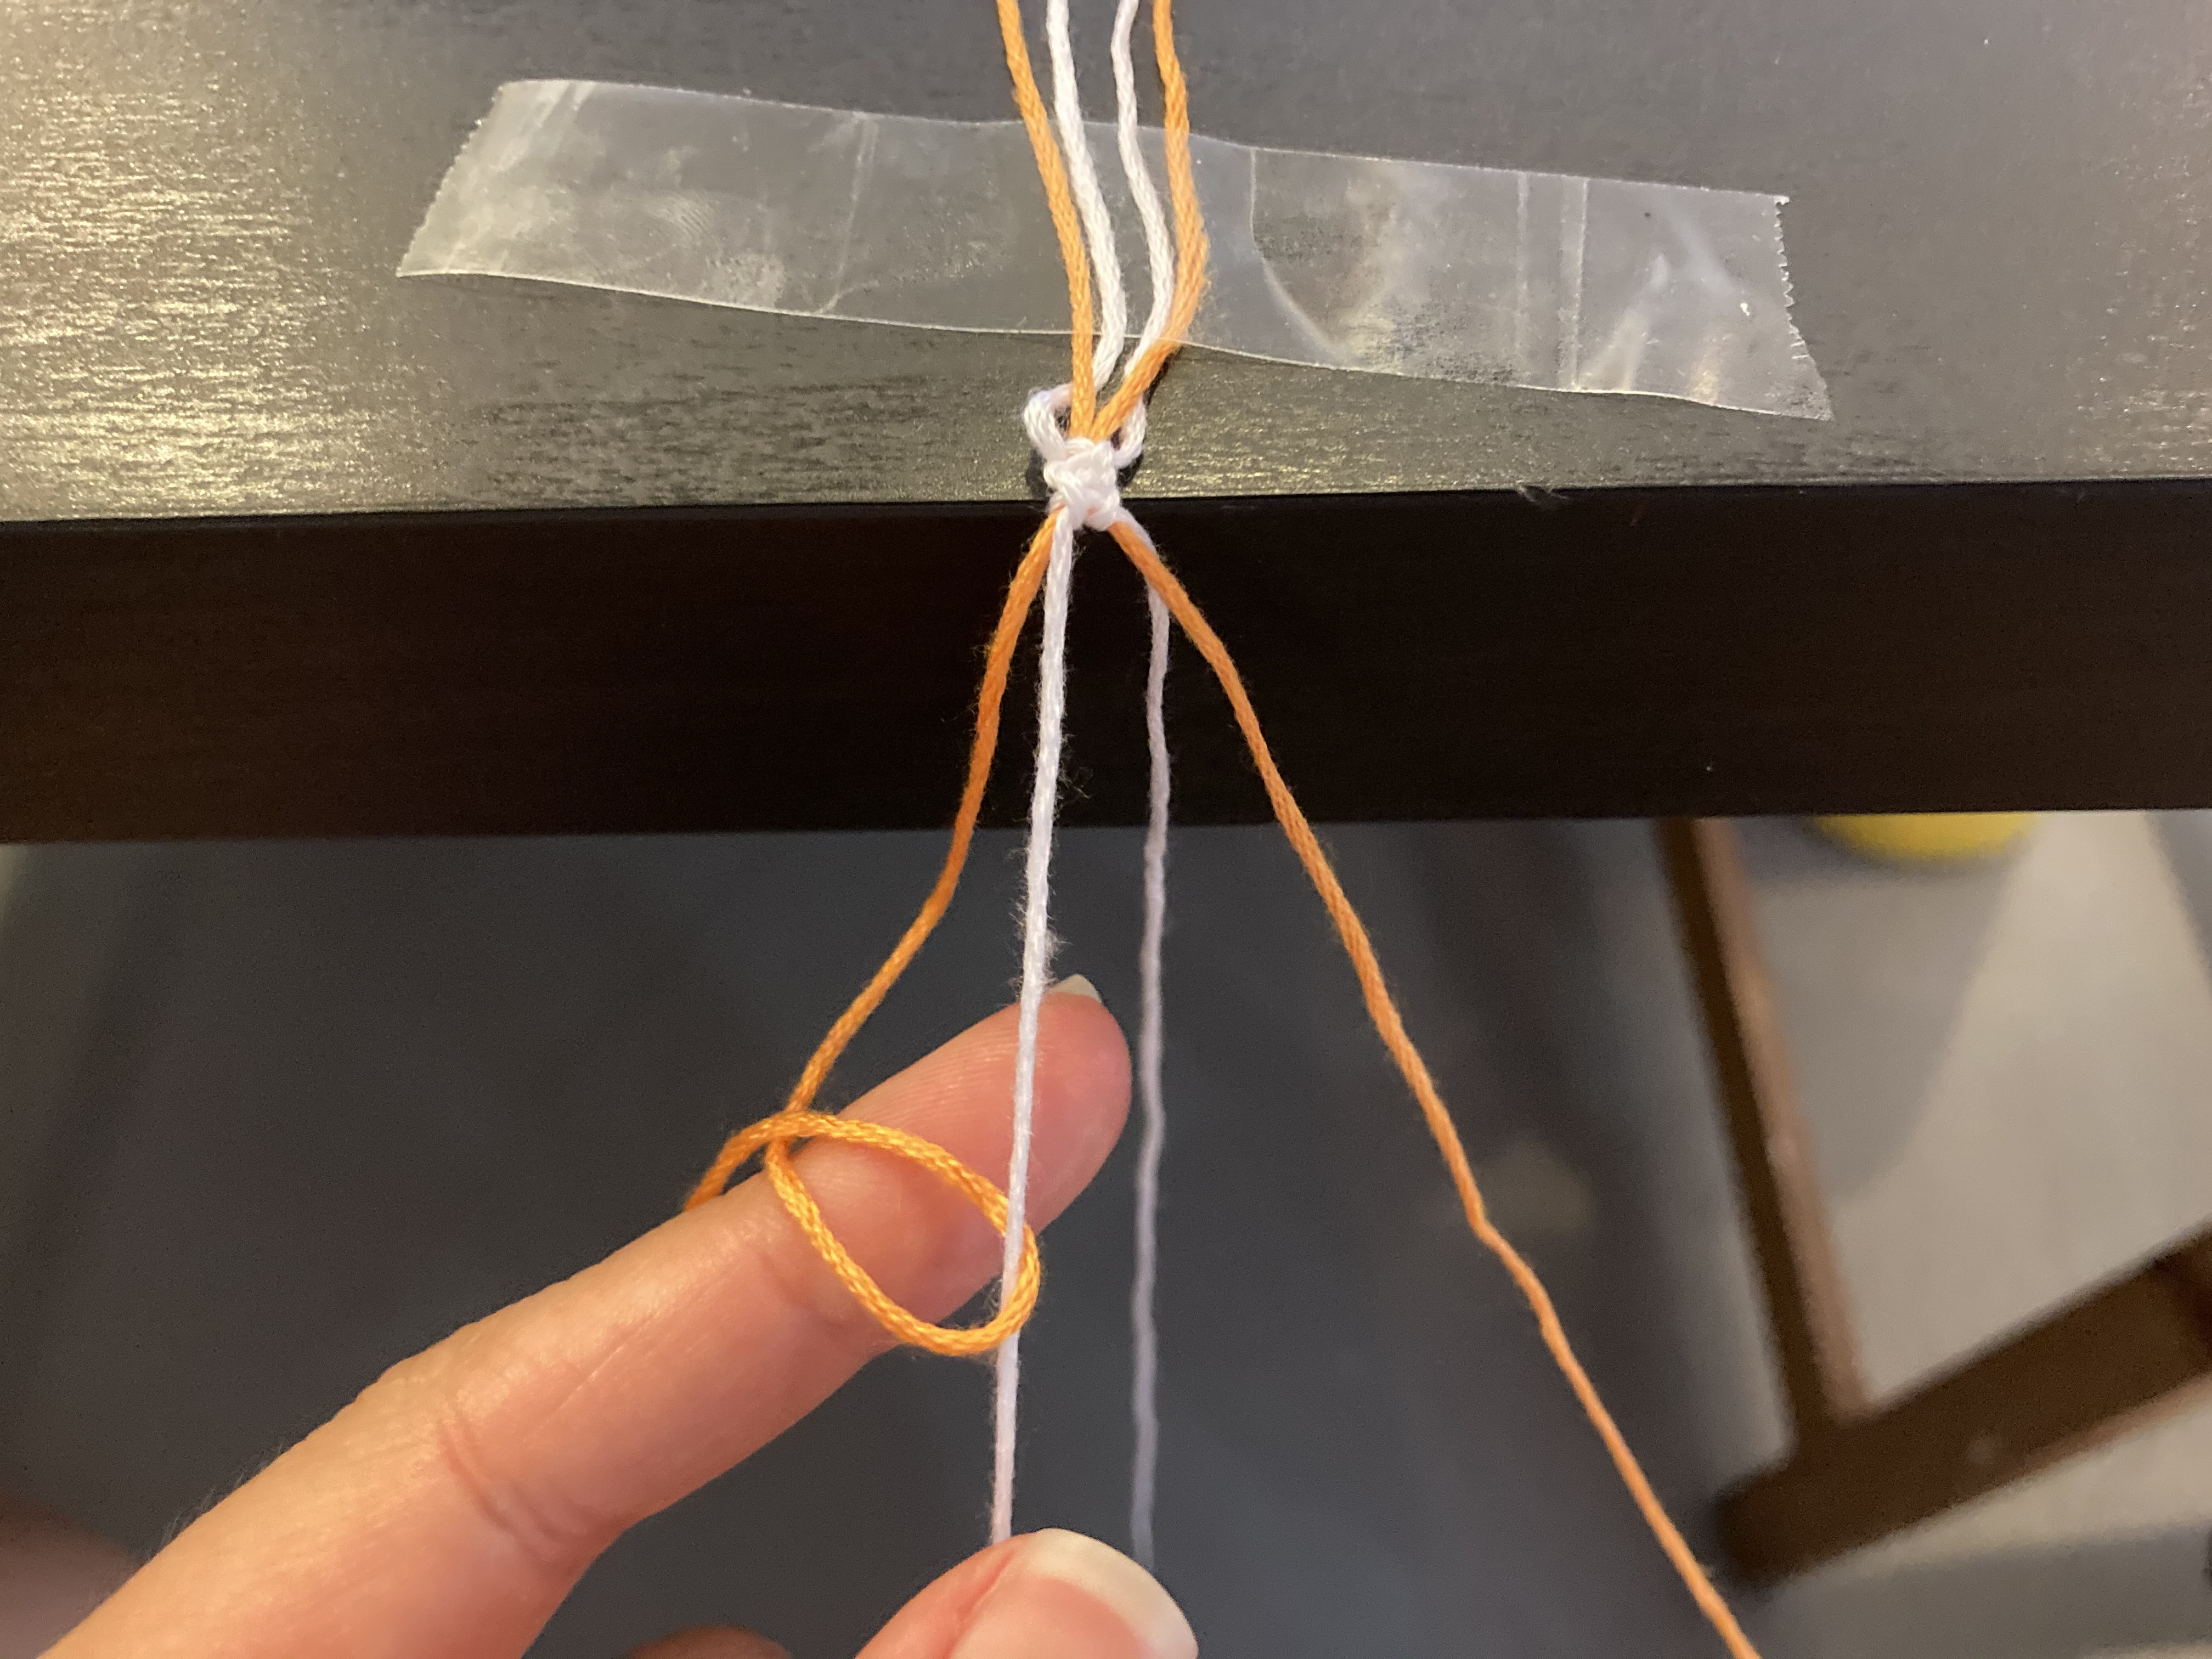
1. Take two wires and fold them in half.
2. Hold them with a piece of tape.
3. Place the two orange wires in the center.
4. Start by folding the two orange threads and place the white threads on top of each side.
5. Tighten and repeat a second time. (The threads bent at the beginning will be the ones that will not be visible.)
6. Next, take the left orange thread and tie a knot around the left white thread passing over it.
7. Repeat the operation 6 times, passing once above and then the other time below.
8. Do the same on the right side.
9. Close your circle by placing the white threads in the middle and bending them side by side.
10. Pass the orange threads over both sides and tighten.

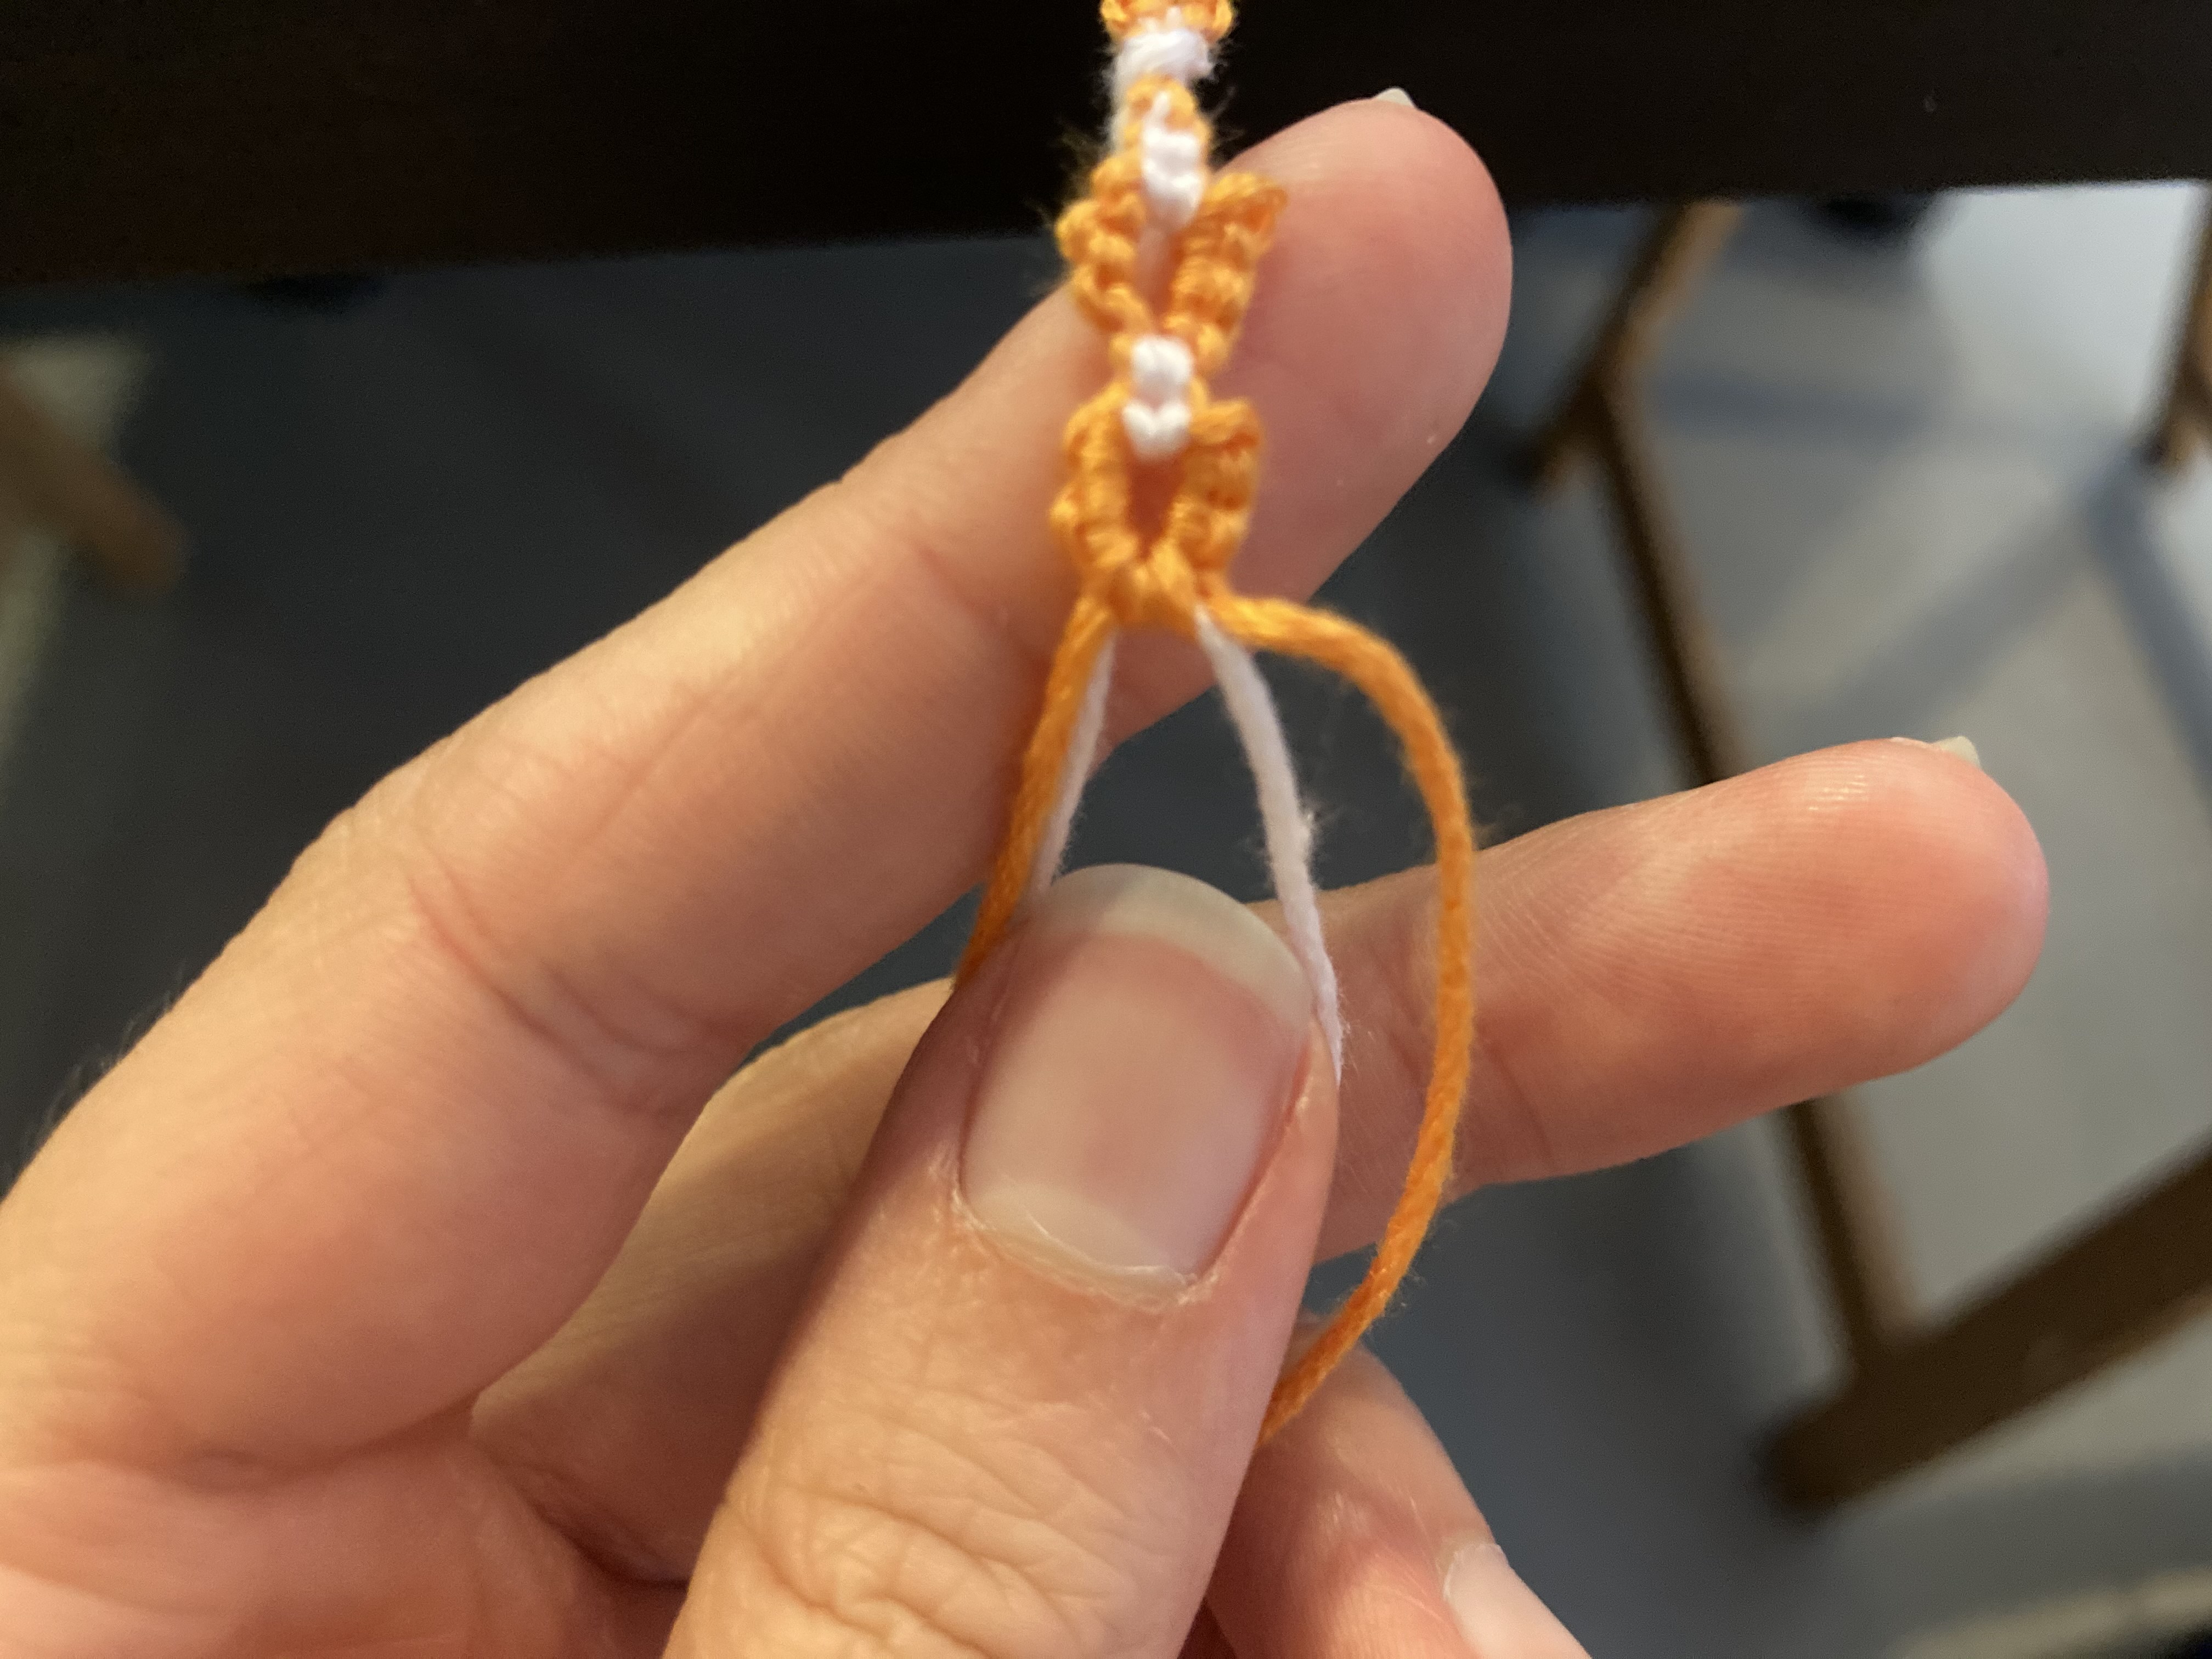
11. Repeat this time by placing the orange threads in the middle and pass the white threads on each side. Repeat the operation a second time.

12. Continue until the bracelet is long enough and close it with a knot or using the technique explained above.
wbblog