
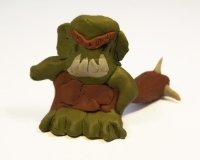
DIY: Make a cave ogre out of FIMO paste
Here's a simple manual job to do with your kids: a cave ogre made of FIMO paste!
We show you how!
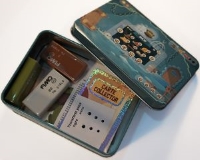
Material:
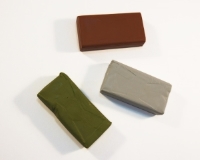
- Fimo ogre box including: 3 FIMO breads of 25 g, 3 eye transfers, a collector's card
- 1 cutter
- 1 pair of scissors
- 1 small wooden knife
Modeling:
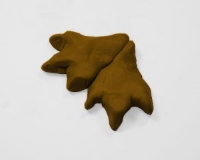
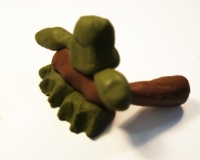
Make 2 small green balls.
Squeeze them lightly to form 2 drops.
Place the 2 drops side by side and do the toes.
Make a log about 3 cm long using the brown dough.
Press the sides to form a bean.
Make a mark in front and behind to form the legs.
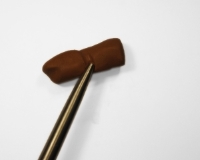
Make a cone so you have a club, then mark it with a thin tool to create the illusion of wood.
Place the body on its pasta then place the club above it.
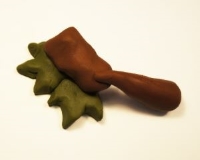
Form 2 other green drops to form the arms then place them on the body (and the club).
Make an egg using almost all of the remaining green (more for the ears) to form the head and then place it on the body.
Cut out the eye transfer, place the printed side on top of the FIMO paste, smooth it gently with your fingers and gently peel it off.
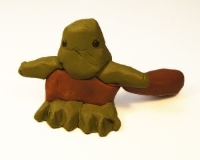
Model a white strip about 3 cm long and 1 mm thick.
Cut out the teeth and place them over the mouth.
Make 2 balls with the rest of the green and flatten them.
Place them on either side of the head to create the ears.
Create a small brown log, place it in a "V" on the forehead and mark the hairs of the eyebrows with a small pointed object.
Make 3 small white cones and glue them on the club.
Place the figurine in the oven on baking paper at 110 ° C for 30 min.
Congratulations, you have just made your cave ogre!
All comments